Free Snipping Tool now supports image import. Importing images can sometimes becomes critical because you want to add related information in snip image that isn't part of the original snip and making image edits outside Snipping Tool will require more time so to quickly import image into the snip becomes quite handy.
To import external images into snip, follow the steps below.
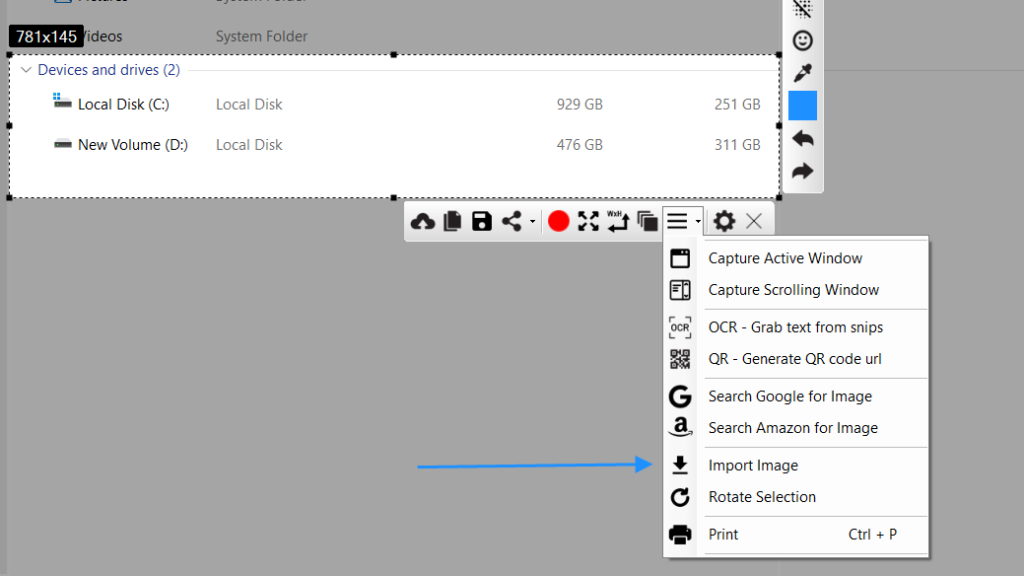
Take a Snip, click three lines icon, and select Import Image option.
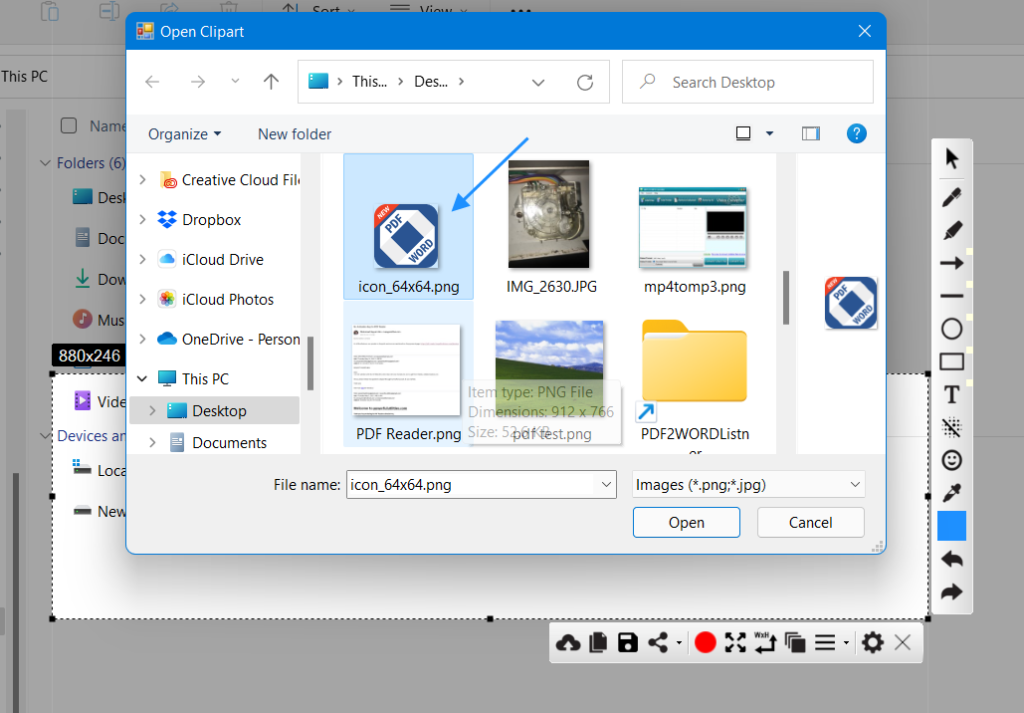
Select jpg or png image and add it.
Click on small tick button to make the selection permanent.

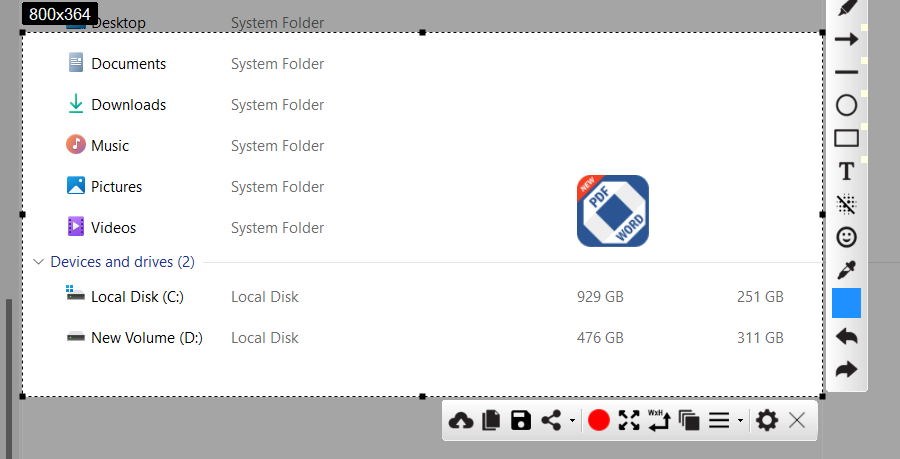
Now you have succcessfully imported that image into your snip. But still, you can use undo button to remove the imported image.